
Building Roguelike in F#
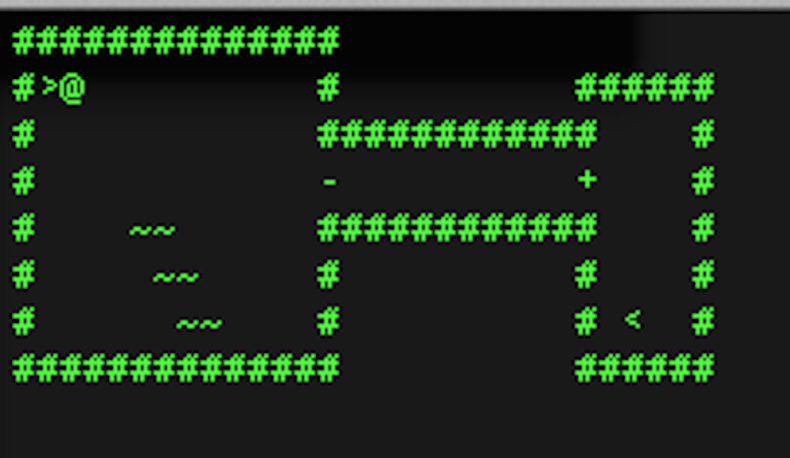
I know many people who started programming because they wanted to write a game of their own. I myself had never done game programming but after I ran into articles about programming a roguelike in Haskell I decided to give it a try using F#.
First I wanted to get hero to move around on map.
These are the types I . . .
Generating music in F# part 3: Note values
Previous posts in series:
Part 1
Part 2
After last post the program can generate melodies using Markov chains generated from seed data. Next important aspect of a catchy melody is note value. Note value means a relative duration of a note.
Just like notes note values are modelled as a type:
type value =
| . . .Posted in: f#
Generating music with F# part 2: Markov chains
Continuing from the previous post.
To make melody generation more interesting I decided to try applying statistical process called Markov chain. In the context of this post by Markov chain I mean that the next state of the system is not completely random but next states have different probabilities that depend on the current state.
. . .Posted in: f#
Generating music with F#
For a long time I have been fascinated with the idea of generating music programmatically. I decided to give it a go using F# and this is what I came up with. I wrote a program that generates a short melody in the key of C major. Not exactly Mozart, but it's a start.
I created a type for notes and a Map of notes to their . . .
Posted in: f#
Hacker News client in clojure
Some time ago Hacker News released official API. What better reason to learn to write http client in clojure using HTTP Kit.
Top stories
Let's start with getting top stories.
(ns hn-cljient.core
 (:require [org.httpkit.client :as http]))

(defn get-top-stories []
(let [{:keys [status headers body . . .Posted in: clojure
hbs - Server side handlebars templating with clojure

Recently I worked on a project where clojure was used on the back end and javascript on the front end. Handlebars was used for front end templating. However, at some point a need emerged to do some server side rendering. Wanting to keep things DRY we looked for a solution that would allow us to have same . . .
Posted in: clojure
Code kata: Business ID validation

photo credit: pasukaru76 via photopin cc
I recently heard about a cool idea for a code kata from a couple of friends of mine. It does not have too many rules, but is more interesting than plain old FizzBuzz. The kata is about validating Finnish Business ID.
Spec
In Finland all companies must have a business id. . . .
Posted in: haskell
